|
Yeast used in bread making are tiny critters that
eat a little flour and give off a gas which makes your
bread dough rise. The store bought bread yeast are
a strain developed by the yeast maker which
works well in bread baking—the maker of the yeast
keeps it always of the same type. When you make a sour dough starter, you are actually attracting the wild yeast that are in the air into your starter. These wild yeast will also make bread rise and help give it that wonderful flavor. There are harmless bacteria (lactobacilli) in the sourdough starter that help make that sour flavor, also, these bacteria make lactic acid. Lactic acid is what makes buttermilk, sour cream, and yogurt sour tasting. Since there are many types of wild yeast, the starter you make in Texas will make bread that will bake and taste different than one made in New York or California.
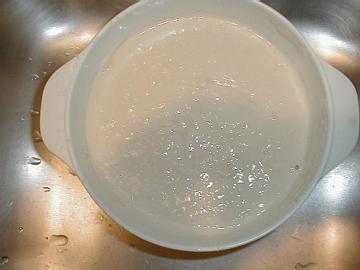
How to make a sourdough starter, it's easy! You need:
2 cups white flour
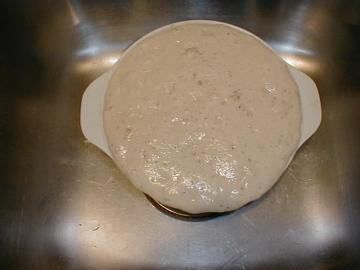
The reason you don't want this starter drying on your drain board is because it is a lot like that school paste you used in 3rd grade! It's hard to clean off once it has dried! On the 2nd day—you can sit it out of the way on your drain board—give it a stir now and then. By this time, you should be smelling a slight beer smell from your starter. This is good! It means your starter is doing fine!
On the 3rd day, you can either use this starter, or put it in a clean jar. Mason quart jars are good. Place the lid on top (don't screw down the lid) and place in your icebox till needed. You will see a clear liquid forming on top of your starter—just stir that back into your starter before you use it.
This should be done the day before you use it for baking or cooking, or, at least every 3 weeks even if you are not baking with it. Remember—the starter is a living thing! Even in the icebox it will need to be fed now and then or it will die. When you are ready to cook or bake with your starter, remove it from the icebox and pour it into a bowl. Let it warm to room temp. At this time, mix up equal parts of water and flour to equal the amount of starter you are going to need. If you are going to bake biscuits that call for 2 cups of starter, add 2 cups of mixed water and flour to your bowl along with the starter you got out of the icebox. Mix all this well and let sit in the sink 24 hours before you use it. This warmed up and fed starter that has been sitting in your sink for a day, is what I call ACTIVE STARTER. This is what is called for in all my sourdough recipes. If you try to take your starter out of the icebox and start baking with it, it won't work! It hasn't woke up yet! This isn't hard to do—just remember:
1. take starter out of icebox and warm up to room
temp Don't forget—that starter is a living thing! It must eat now and then. Even if you don't use it, you have to feed it anyway! About every 3 weeks feed it 1 cup of water and flour. Let it sit 1 day. Remove what you don't want to keep (you can give this to a friend to start his or her sourdough starter) then put back into the icebox. When you are out in the woods, just leave that starter out side (in a bug proof container). If you use that starter every few days, it don't need the icebox at all! What I do is place a single layer of plastic (half of a sandwich bag) over the jar mouth. Put on the Mason sealing ring, prick a small pin hole in the plastic. That's it! You don't want this too hot! Keep it in the shade and out of sunlight. If where you place the starter might get over 100 degrees, put it in the cooler. Wild yeast don't like high temps or freezing temps. That's all—it's easy to do!
|