Then I remembered the success, and fun, my cousin and I had as children shooting rats in the corn crib using 22LR shotshells, "ratshot," we called it. The corn crib was about 15' X 15' with probably a 12' ceiling. When the crib got down to a small pile of unshucked corn in a corner, we'd go around the outside of the crib and stop up all the rat holes with old corn cobs. Then we'd get inside, close the door, and start moving corn to another corner. Rats would explode from the pile and race up the walls and around the ceiling joists. We'd blast away with ratshot, killing dozens of rats and mice. So I decided to blast my bees with 22LR ratshot. Then I checked the price: about $6 for a box of only 20 rounds or about 30¢ each. Hey, I had a lot of bees! Then I remembered the Speer shot capsules I used to load for my Ruger Super Blackhawk 44 magnum pistol. Then I checked the price: about $9 for a box of 50 or about 18¢ each. Heck, I figured, by the time I added the cost of powder, primer, and shot, it might be cheaper to hire Orkin to get rid of the danged bees! Luckily, the snailmail lady delivered the April 2005 Handloader magazine and there on page 46 was a Mike Venturino article titled "Handgun Shotshells." So I made some, using #4 shot because I had it on hand instead of #12 shot like Mike used. I also used paper wads instead of copper gas checks like Mike used. Holes in the pattern let the bees escape. Picture two black marbles glued together for an example of the size of the bees. Even centered by the blast, the bees often flew away. I needed much smaller shot. A call to Ballistic Products produced a 10 lb bag of #11 shot. They were out of #12 because of a sudden high demand, the order guy informed me. I told him about the Handloader article and said he could thank Mike Venturino.
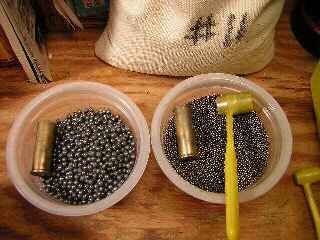
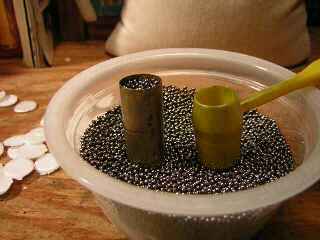
The photo shows #4 shot on the left and #11 shot on the right. The #11 is much smaller, so the 44 mag cases you see there for scale will hold way more pellets.
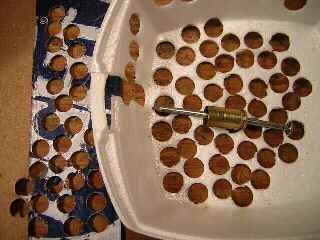
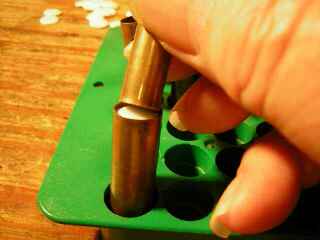
While pondering a replacement for the 44 mag hull which was now mangled beyond use, I spied a 45ACP hull. It would make wads maybe .020" larger in diameter than the 44 mag hull. They would fit the case better, I assumed. On the left above, see part of a Schaefer Light case with wad holes. On the right above, see the to-go container with wad holes. In it, see the 45ACP case with nail.
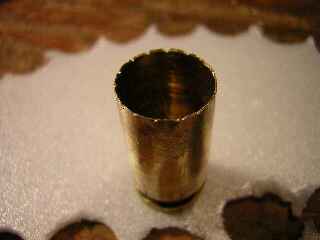
A couple of days after taking the photo above I needed more wads. The thought struck me to serrate the edge of the 45ACP case. I used a triangular file and carved the notches you see in this photo, making the 45ACP case rim like a saw. I used a chamfer tool and removed the burrs on both inside and outside. The saw blade-like rim tripled wad production!
Update, 4-26-06: I invested $53.00 in a Buffalo Arms Company press mounted .430" wad punch, # 4440PMWP. That sucker is as high as a camel's back, but it's a precision tool and worth every penny. It'll punch wads out of Styrofoam, beer cases, beer flats, shipping boxes, etc., etc. I used 2400 powder because I had it on hand. I used a Lee .7cc dipper due to experimentation, which I explain below. I used a heaping dipper full because it was faster that way. The heaping dipper held about 9 grs of 2400. I dumped the dipper of powder in the case, then thumb-seated an over-powder wad. Using the head of the same nail you see above, I then seated the wad on top of the powder, with slight compression.
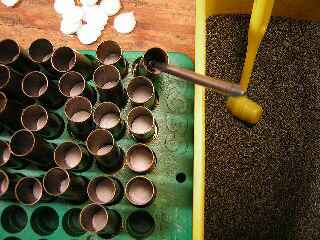
At the left in a loading block, we see charged cases with over-powder wads seated. The top right case shows the nail with its head down in the wad seating position. On the right, we see a bowl of 2400 and a Lee .7cc dipper. It is doubly important to use a loading block and visually inspect the interior of your cases when loading 44 mag shotshells. We all know a visual inspection prevents double charges. But sometimes a wad doesn't seat straight and its edge will dig into the powder. When the wad is fully seated, then, a substantial portion of the powder flips up and lands on the top of the wad. You can easily see that with a visual inspection.
Use whatever Lee dipper fills the case or slightly overfills it. Then use the lip of the dipper and scoop out all the shot you can from the case. Like for the case you see here, that will leave just enough room in the case for an over-shot wad. The charge of shot you see here weighs about 150 grs. Each tiny #11 shot weighs about .3 gr. A little math tells us the case holds about 500 shot pellets. That's powerful bumblebee medicine.
Thumb seat an over-powder wad on top of the shot, then fully seat the wad with a 357 magnum case.
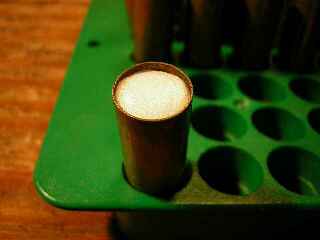
Here we see the same case from above and with the wad fully seated. We've left a little room below the rim for a shot of Elmer's® glue.
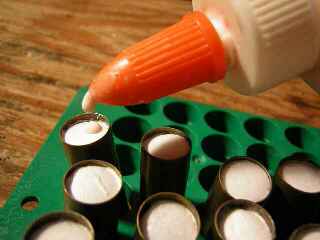
One drop is all it takes.
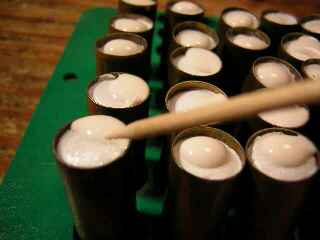
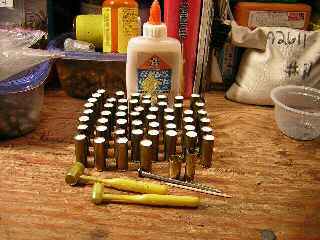
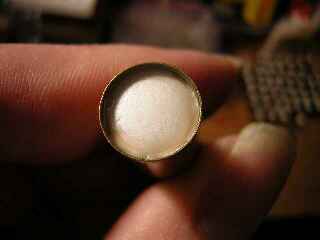
We then take a toothpick and smear the drop of glue around the edge of the wad. After firing over 100 rounds with these glued-in over-shot wads, I saw no trace of glue on the fired cases or in my pistol barrel. No traces of Styrofoam residue or lead, either. Here we see about 50 rounds of 44 mag shotshells waiting for the glue to dry. In addition to the Elmer's® glue, we also see the simple tools I used: two Lee dippers; a toothpick; a nail; a 45ACP hull and a 357 magnum hull. I didn't even resize the cases. I deprimed, reprimed, then loaded. Here's one of the above cases the next day. The glue is dry.
Update, 3-27-07: Elmer's Glue won't stick to some kinds of Styrofoam. If recoil knocks your overpowder wads loose, re-seat them with a thin ring of epoxy.
I'd guess 80% of the pellets hitting the front of the can you see here exited the back of the can, i.e., penetrated two layers of beer can aluminum. Those dozens of pellets dented the can behind this one with only three of them penetrating the front of the can behind, i.e., three pellets penetrated three layers of beer can aluminum. This can and the one behind it were sitting on top of a cardboard box. Dozens of pellets hit the box and penetrated two layers, i.e., all the way through the box. This was with the Lee .7cc dipper of 2400. With the Lee .5cc dipper of 2400, the front of that test can looked like this one, but only two pellets made it through the back side, i.e., penetrated two layers of beer can aluminum. None of the pellets hitting the cardboard box made it through the other side of the box.
Update, 3-13-06: A .7cc dipper heaping full of surplus WC820 (n) works just as well and at 1/4 the price. Factory made 44 magnum shotshells run about $1 each. Factory made 22LR shotshells run about 30¢ each. My 44 magnum shotshells cost about 10¢ each. I'm saving bunches of money and decimating the bumblebee population around my house. I think #12 shot would be better than #11 as the case would hold many more pellets. Mike's 45 Colt cases with #12 shot held about 1,000 pellets vs my #11 shot and 44 magnum cases with about 500 pellets. But mine play hell on bumblebees, let me tell you. It's like I'm a kid again with the corn crib rats. And like those rats, bumblebees don't stay still for very long. Shooting them on the wing with a pistol is for sure a challenge. Only problem is watching my backstop! House windows and windshields don't come cheap!
|
