|
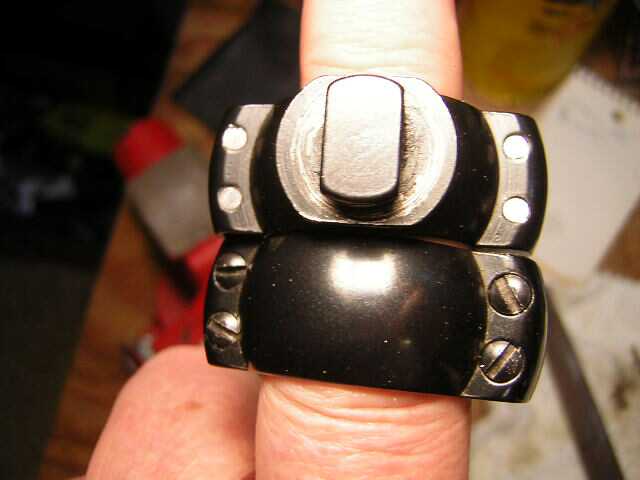
I get occasional emails from guys wanting screws for old Redfield rings. Normal 6-48 or 8-40 ring screws won't fit. I tell them, Sorry, but I don't have the proper screws. Then Steve B from Washington emailed about his old Redfield rings and their boogered screws. He knew the proper size—pre-1981 Redfield ring screws are 5-44 x .355". No one sells them. The thought struck me that the 5-44 x 1" Fillister screws I sell could probably be altered to fit. So I decided to do a how-to article on the altering process. I had Steve send me his rings and the boogered screws. I'd alter new screws, if I could, and send Steve's rings back either still boogered or like new. Whichever case, he'd get his rings back for free. He jumped on the deal. Let's get one thing straight—I won't do this again except on scope rings of my own. You'll have to alter your own screws. Another thing—it would take a gunsmith maybe two hours or $50 to $100 to alter eight screws. So spend $25 on new rings or alter the screws yourself. Plus, as you'll see below, Steve's rings had a factory defect which I had to correct. There was a reason the screw heads were boogered….
You will need:
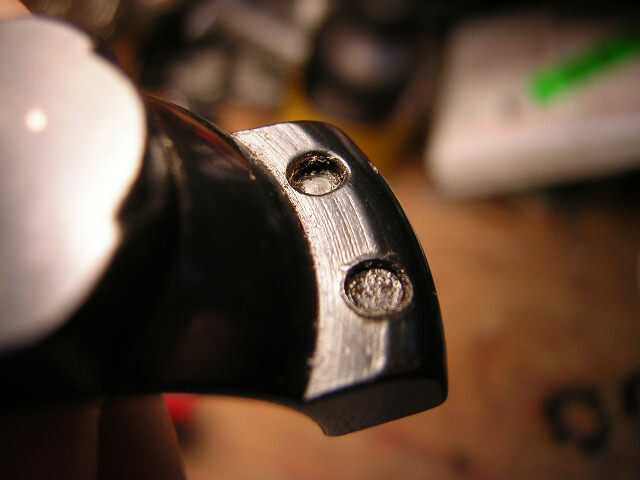 I checked out Steve's rings when they arrived and noticed old thread-lock debris in the tapped holes.
 Steve had sent the boogered screws, so I figured I'd simply screw one in from the flat side of the ring bottom and push out the thread-lock debris. But I couldn't hand turn the screw all the way into the hole. I found a hex key for the boogered screw head, but even with force I still couldn't turn the screw all the way in and through the hole. I tried another screw in the neighboring hole. Worse. The holes hadn't been tapped all the way through!
I checked the other two tapped holes in this ring bottom and the four tapped holes in the other ring bottom—all were short tapped. No wonder the screw heads were boogered.
It was an epiphany for me, and so should it be for you. No wonder some scopes are "hard to zero," as guys often complain. They tighten their ring screws so hard it boogers the heads, and the scope still changes zero or Maybe their ring bases are short tapped. I'll never again install new scope rings without running a screw through all of the tapped holes as a check for short tapped holes. If I take one of my scopes out of its rings, I'll run a screw through all of the tapped holes. I suggest you do the same!
I suspect the factory guy had his depth-stop set for a plug tap and broke it or lost it and mistakenly installed a taper tap. The tapered tip of a plug tap is much shorter than the tip of a taper tap. So the tap itself went through the holes to the proper depth, but its cutting threads didn't—thus short tapped holes. I suspect several Redfield rings were short tapped that day 30+ years ago. Again, I suggest you check the tapped holes in all brands of scope rings.
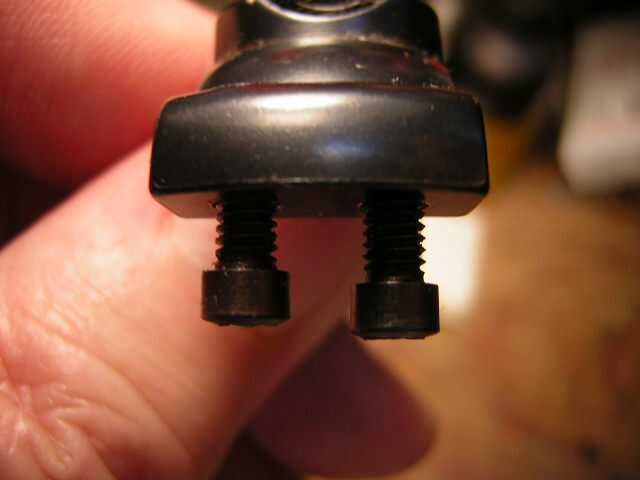
The head diameters of the old, boogered Redfield screws were .172". The head diameters of my new screws were .194". So I clamped them in my drill press and pressed a file against the spinning side.
Not a single screw encountered resistance during 44 turns. Slick as you-know-what. Note the front, bottom left screw. See how it's at an angle compared to the screw behind it? That's because the hole was drilled at an angle. That particular factory defect bothered me, but in the final analysis it made no difference in the performance of the rings. Still. . . .
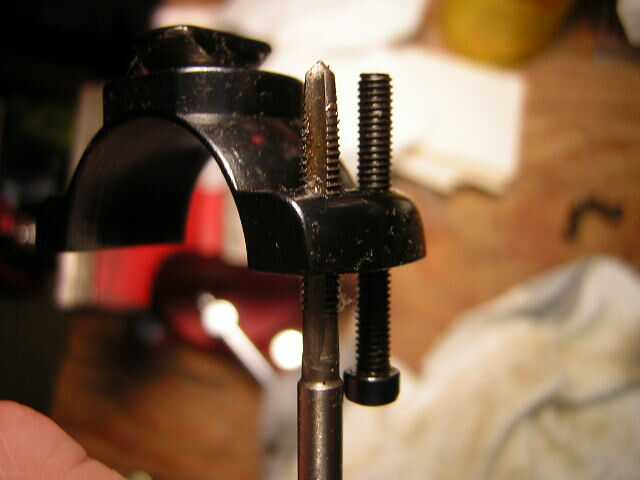
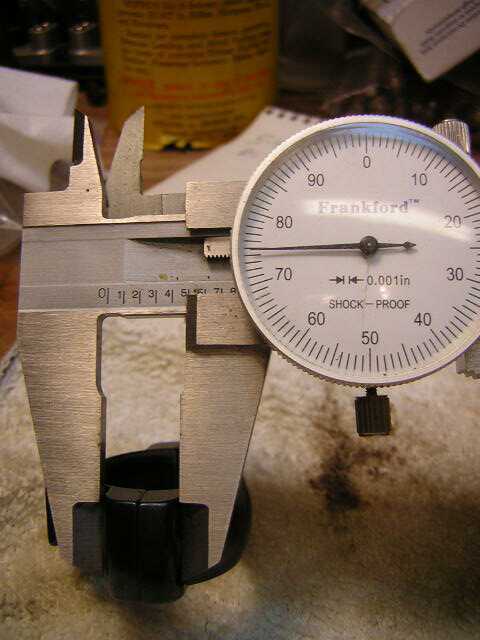
Hacksaw TimeFirst step was to determine the needed OAL of the finished screws. I clamped two ring halves together and measured the distance across the screw-hole area with my micrometer as you see it here. The resulting measurement of .475" would be my benchmark OAL for the finished screws. A straight edge previously placed across the tops of the new, seated screws showed them level to almost level with the surface of the screw-hole area of the top ring. I estimated a ± .002" level to not-level difference would be fine. As one turn of a 44 screw is 1 ÷ 44 = ~ .0227", I needed a rough-cut OAL with a margin of error of more than 1 thread.
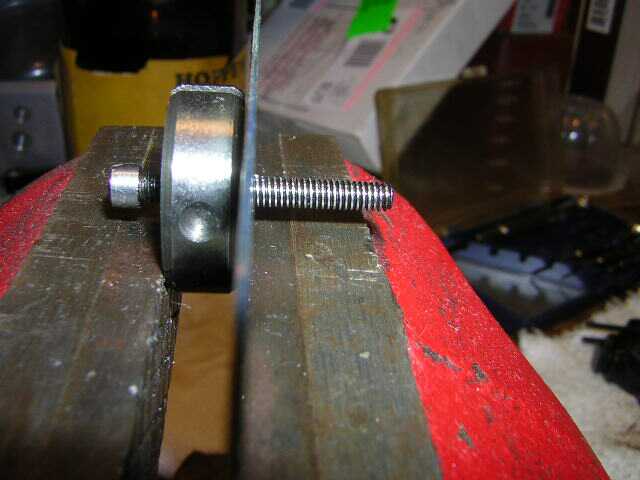
I then clamped the die in my vise as you see here and hacksawed off the excess screw length, using the back of the die as a guide for the hacksaw blade. The hacksaw blade marred the die not at all. Next, I filed the cut-off screws to a near-exact .475" OAL.
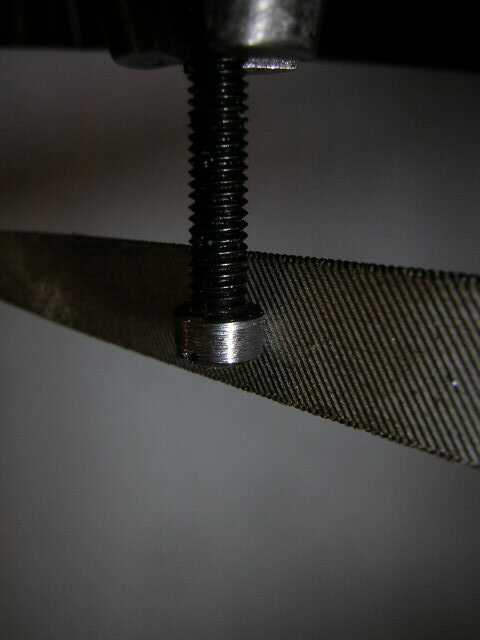
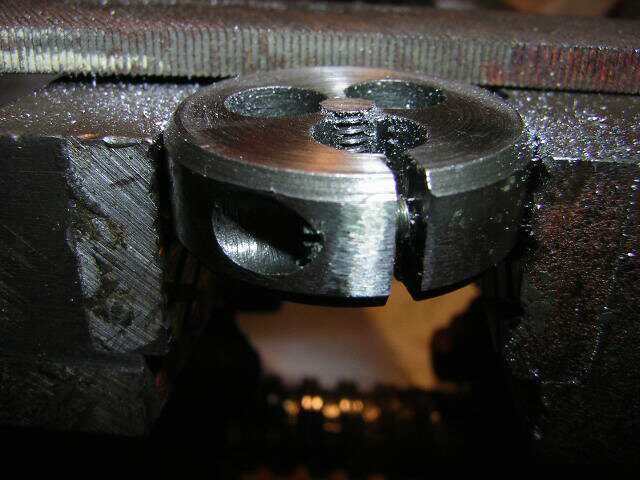
Then I measured the OAL of the cut-off screw, still in the die, and then determined how much to file off the tip using the 1-thread-distance of .0227" as a guide. For example, 1/4 of .0227" is ~ .0057". So if the screw's OAL was .485" I needed to shorten it .010" or not quite 1/2 turn to reach my goal of .475". I would then turn the screw in a tad more than 1/4 turn. I then began filing and measuring, filing and measuring. As the full-size version of the above picture shows, it was easy to file the screw tip exactly even with the top of the die. The big, coarse file you see in the background barely scratched the surface of the die. It was easy to control the OAL of the finished screw via the method of 1/4 turn = ~.006" so 1/8 turn = ~.003". I ended the process with eight screws whose OAL perfectly fit the two rings.
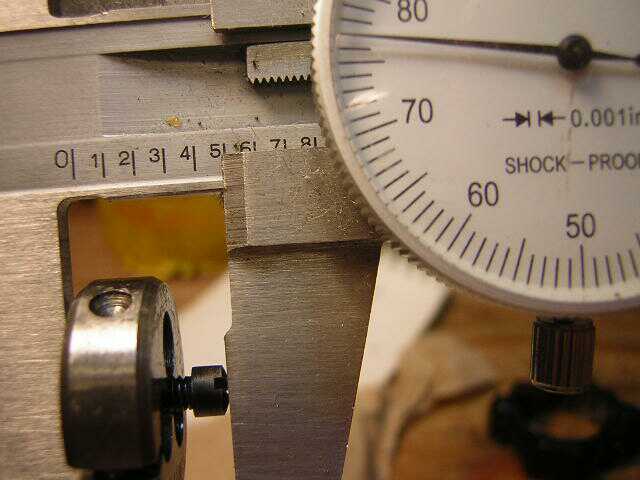
This picture shows the measuring part of the shortening process. As it shows an OAL measurement of exactly .477" I could have either left it be, as I did, or I could have turned the screw in not quite 1/8 turn and filed it down ~.002". Using this measure and file method with the proper size die, a person could shorten any screw in circa .002" increments. That's good information!
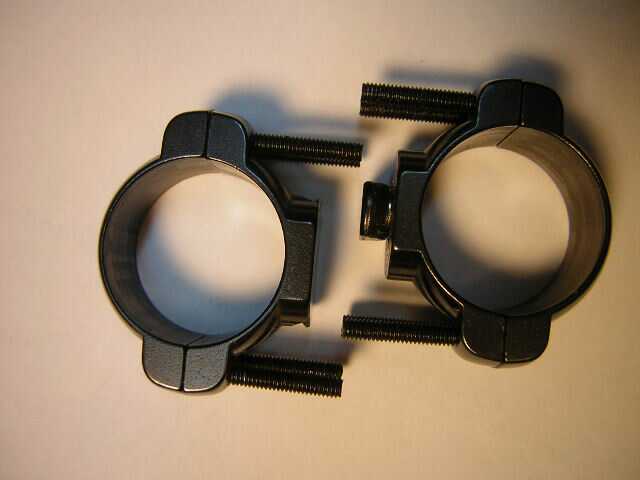
Looking good, huh?
|